We know looking and feeling your best on your wedding day is mandatory. So in search of a simple, equipment-free workout, we partnered with one of the most disruptive trainers on the Dallas fitness scene, Crystal Pollard - Mindset Coach and Leader of A Tribe Called Sprinters - to take us through four exercises that will have you and your significant other ready in no time.
6 reps//AMRAP//10 minutes
AMRAP - “As Many Rounds As Possible.” You will do six reps of each exercise (per side for the first three). Once you make it through all four exercises, you have completed one round. This process should continue for 10 minutes. Your challenge is to complete as many rounds as possible in 10 minutes. While this can be done by yourself, it’s so much more fun to grab that special someone and challenge one another to see who can complete the most rounds in 10 minutes. But always remember - quality over quantity.
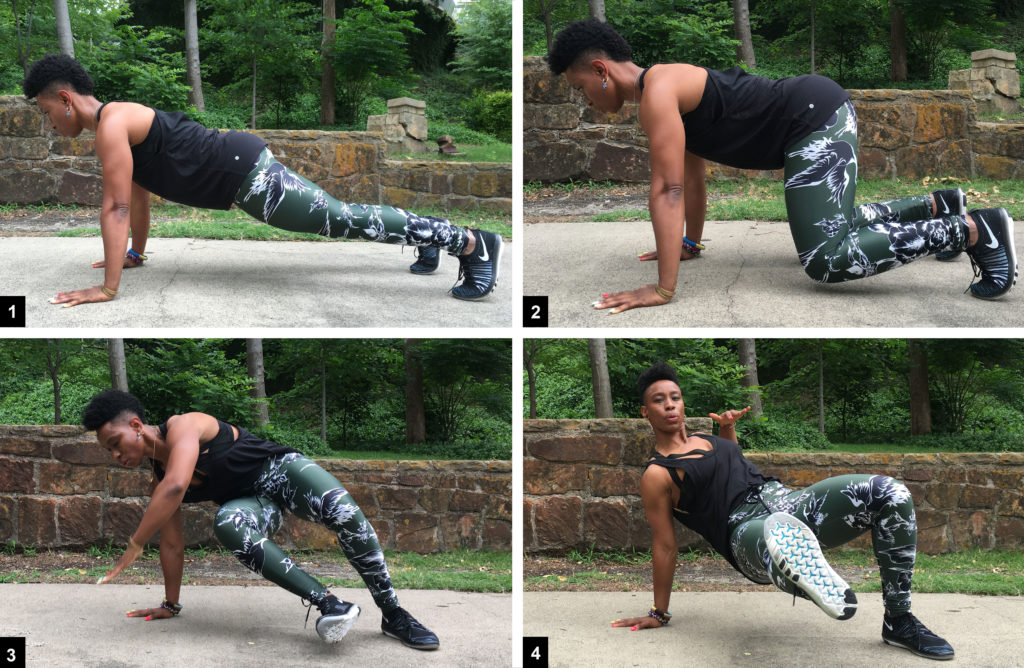
1. Kick Throughs (Controlled)
- Begin in a plank position making sure your shoulders and wrists are in line and your body is in a straight line from your shoulders to your ankles.
- Slowly walk your feet up until your knees line up under your hips. Pick up your left arm and your right foot to create clearance.
- Drive your right heel out to the 9 o’clock position. Your left heel must remain in contact with the ground, hips tall, glutes tights and shoulders packed.
- Return back to the start position and repeat on the other side.
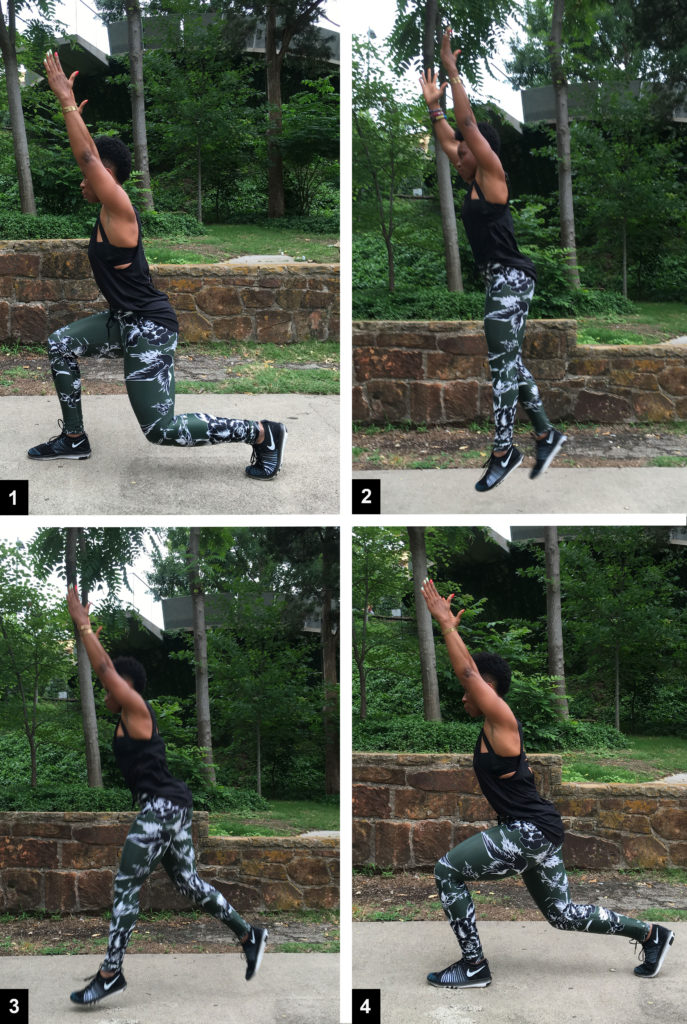
2. Plyo Split Jumps (Arms Overhead)
- Begin in a split lunge position with the right foot forward the left foot back, keeping 80% of your weight on the front leg and 20% on the back.
- Jump upward and reposition your legs while in the air, landing with your feet in the opposite positions.
- As soon as your feet land, repeat the action alternating the feet.
- For an extra balance and core challenge, lift your arms overhead.
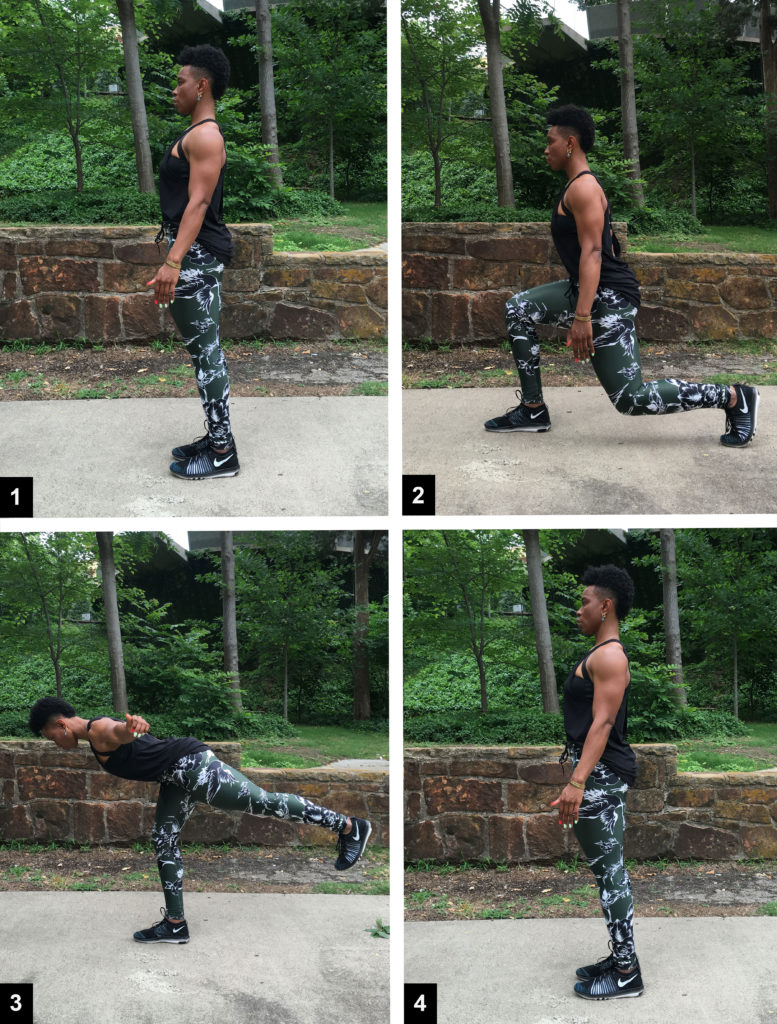
3. Two-Point Lunge with RDL (Romanian Deadlift)
- Begin with both feet together.
- Take a large and controlled step backward with your left foot. Lower your hips so your front right leg is parallel to the floor with your right knee directly over your ankle. Your left knee should be bent at a 90-degree angle, pointing toward the floor with your left heel lifted. Return to standing by pressing your right heel into the floor and brining your left leg forward back to the starting position.
- Slightly bend your right knee and hinge forward from the waist while pushing your hips back and driving your left heel back.
- Drive your right foot into the ground and use your right glute and hamstring to pull you back to the standing start position. Be sure to keep a neutral spine and your core tight. Alternate legs.
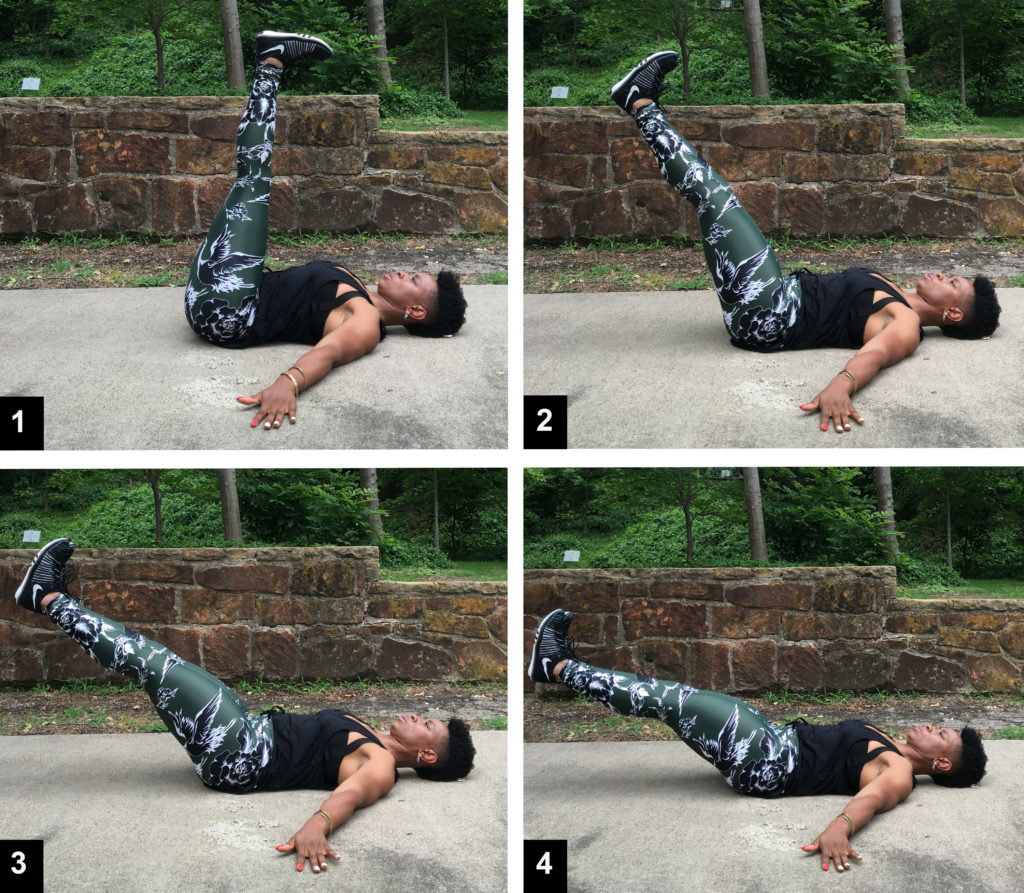
4. Lying Leg Raises
- Lie on your back. Keep your lower back in contact with the floor and bring both legs to 90 degrees so they are in line with your hips.
- Straighten your legs in line with your hips as much as possible, squeezing feet and legs together. Place your arms out wide to your side for support.
- Keeping your legs straight and lower back flat and controlled, slowly lower your legs to the ground - only going as low as you can without arching your back.
- Once you reach this point, squeeze your abs and bring your legs straight up back to hips.
About Pollard
 Pollard holds a BSBA degree from the University of North Carolina Chapel Hill, and has built quite an impressive resume to date thanks to her 20+ years in the sports and fitness industry- Nike Trainer, Equinox Personal Trainer and Group Fitness Instructor, USA Track and Field Certified Coach, NASM Certified Personal Trainer, Onnit Academy Certified Foundations Trainer, Kettlebell Level Two Coach, Bandier and Vimmia Brand Ambassador and Alumni Lululemon Ambassador. Beyond her work as a trainer, Pollard sets herself apart as a visionary in the fitness field, with her heart firmly planted in her work but her eyes and soul always fixed on the next great way to make a community of fit, happy and healthy people.


